Monday, 30 August 2010

The Summer Project - Two Dresses Finished ... and One T-Shirt!

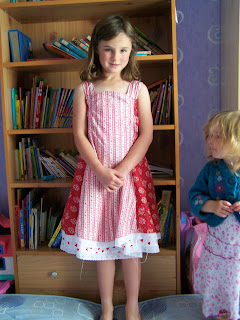
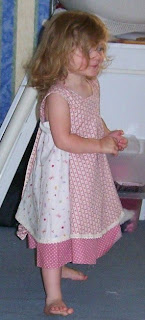
Two happy girls in their new dresses, ready to visit their grandparents and uncle yesterday.

Little boy was shown his sisters' new dresses on Friday night and said "why haven't you made me something special to wear, Mummy?" Oh no! Huge Mummy-guilt! I told him to choose some stretchy fabric from the drawer and I'd make him a t-shirt. Here is the result. I used the Imke t-shirt pattern from the "Sewing Clothes Kids Love" book. The neckline is a bit wobbly as I accidentally stretched it a bit while sewing, but otherwise I'm pleased with it. Little boy was very happy.


Just to prove that I have inherited a crafty gene. Here is a train that my grandfather made for my little brother (now that big bearded chap in the photo above) over 30 years ago. It's still in amazing condition and the children all had lots of fun playing with it.


The red dress is finished! Big girl loves it, and enjoys twirling around in it.


Thursday, 26 August 2010

Summer Sewing Project Update


Dress 2 is coming along nicely. Here's a preview:


Thursday, 12 August 2010

Freezer Paper Stencilling


Having seen several tutorials and examples of other peoples' freezer paper stencils, I couldn't wait to have a go. We love fabric painting in this house, and I have a box full of Dylon fabric paints that the kids couldn't wait to use during the school holidays. We bought a few blank t-shirts, and I located some freezer paper (not easy in the UK, but some online quilting shops sell it).


It's a roll of white paper, with one shiny side. To use it for stencilling, you cut out your stencil and iron it onto the fabric with the shiny side downwards. Then you simply paint over it, wait till the paint dries and peel the stencil off the fabric. Dead easy!

Note: You need "Freezer Paper" for this, because the plastic-coated side sticks to the fabric when heated. Baking paper, greaseproof paper, wax paper and other kitchen papers do not do this! (I mention this because I've seen this question asked a lot on other blogs.)

The children each chose the picture they wanted. A fairy for big girl, a train for boy and a butterfly for little girl. Daddy wanted an England flag on his.

This is what we came up with:


We'll definitely be doing this again.

Saturday, 7 August 2010

Here's the small dress, nearly finished! I just need to sew in the threads and hem the underdress.

Elasticated back of the bodice.
One ruffle, with fancy trim hiding my horrible stitching.

I decided to only put two ruffles on the back instead of the planned four.

The nearest I could get to a photo of the front.

The back.

I'm pleased with it, and big girl can't wait for her red version!

Thursday, 5 August 2010

Progress on the Girls' Dresses

All the pieces for the dresses are cut out, and big girl and I laid them out to see roughly what the finished dresses would look like. Here is the back of the size 7 - 8 dress.

... and the front.


Here is the back middle section of the little dress.


and the front.


So far I've only sewn the front of the tiny dress. It's looking cute though, and I think the completed dress is going to be lovely. I only hope I've made the right size!

I decided to take the advice of the tutorial and add elastic to the sash, so little H can get it on and off without undoing the ties.


I do love these fabrics! The trim looks good with them too.

The overdress so far.